Morning,
I hope that you have enjoyed this week of pregnancy images that i have posted.
Today i thought id share some behind the scenes images and some thoughts with the lighting used.
Fuji XT1 f5.6 1/30 ISO 800
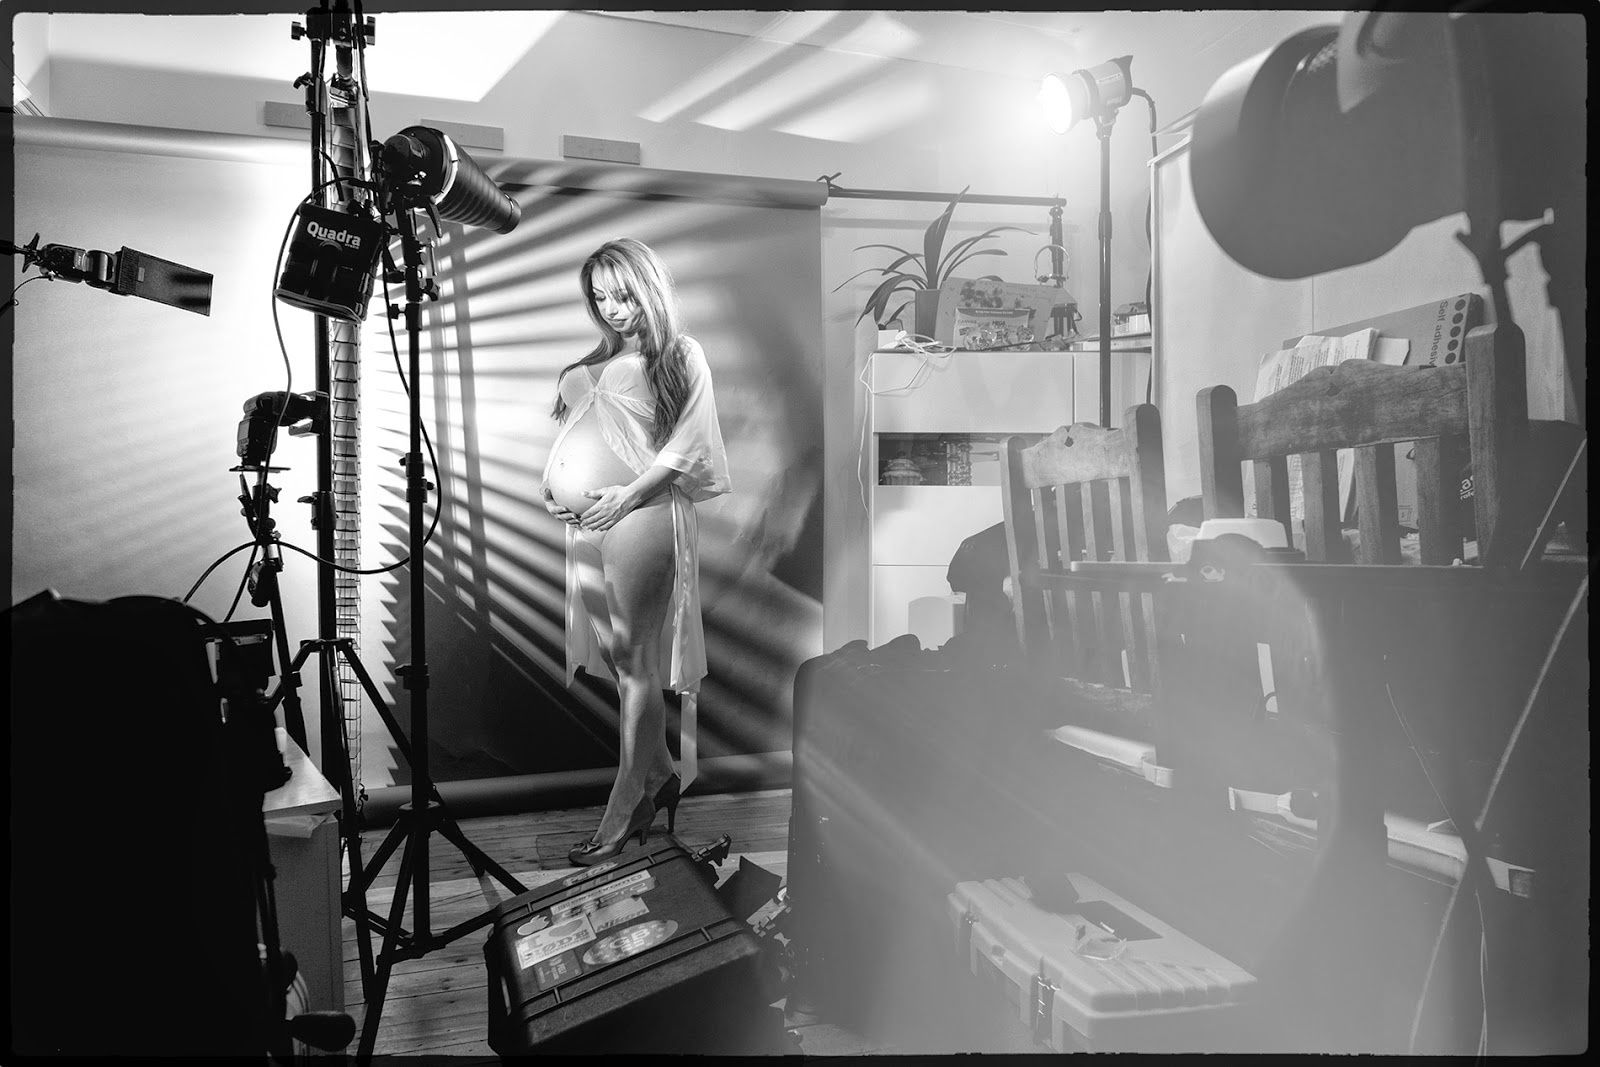
As you can see from the above image, these were taken in my cramped dinning room. Even without a large space, using a little imagination and being creative with your space, you can create some nice images.

Nikon D800 f5.6 1/200 ISO 100
The important part i find is to light your subject how your like. Once lit well, then you can play with the background and try different things.
The above images are straight out of the camera. RAW files converted to JPGS.
Image on the left - the background was lit with a strobe covered with a red gell. Personally i didn't like this too much and so didn't process this.
The middle image - is obvious. I turned off the background light and so it rendered to black.
Image on the right - i turned the background light around and it shone on to the subject, bouncing back to illuminate the background.
The black background and the grey one, were processed to make the image have a little more interest. If you would like me to show in a future post how i did that, then please let me know.

Nikon D800 f1.6 1/80 ISO 100
The above images were not shown in the week, but thought id share them for a little fun.
They were lit, with a simple over head projector. The sort that were used in schools.
I printed on clear plastic an image of blossom i found on a stock image site.
No fancy photoshop here, just an image using a projector.
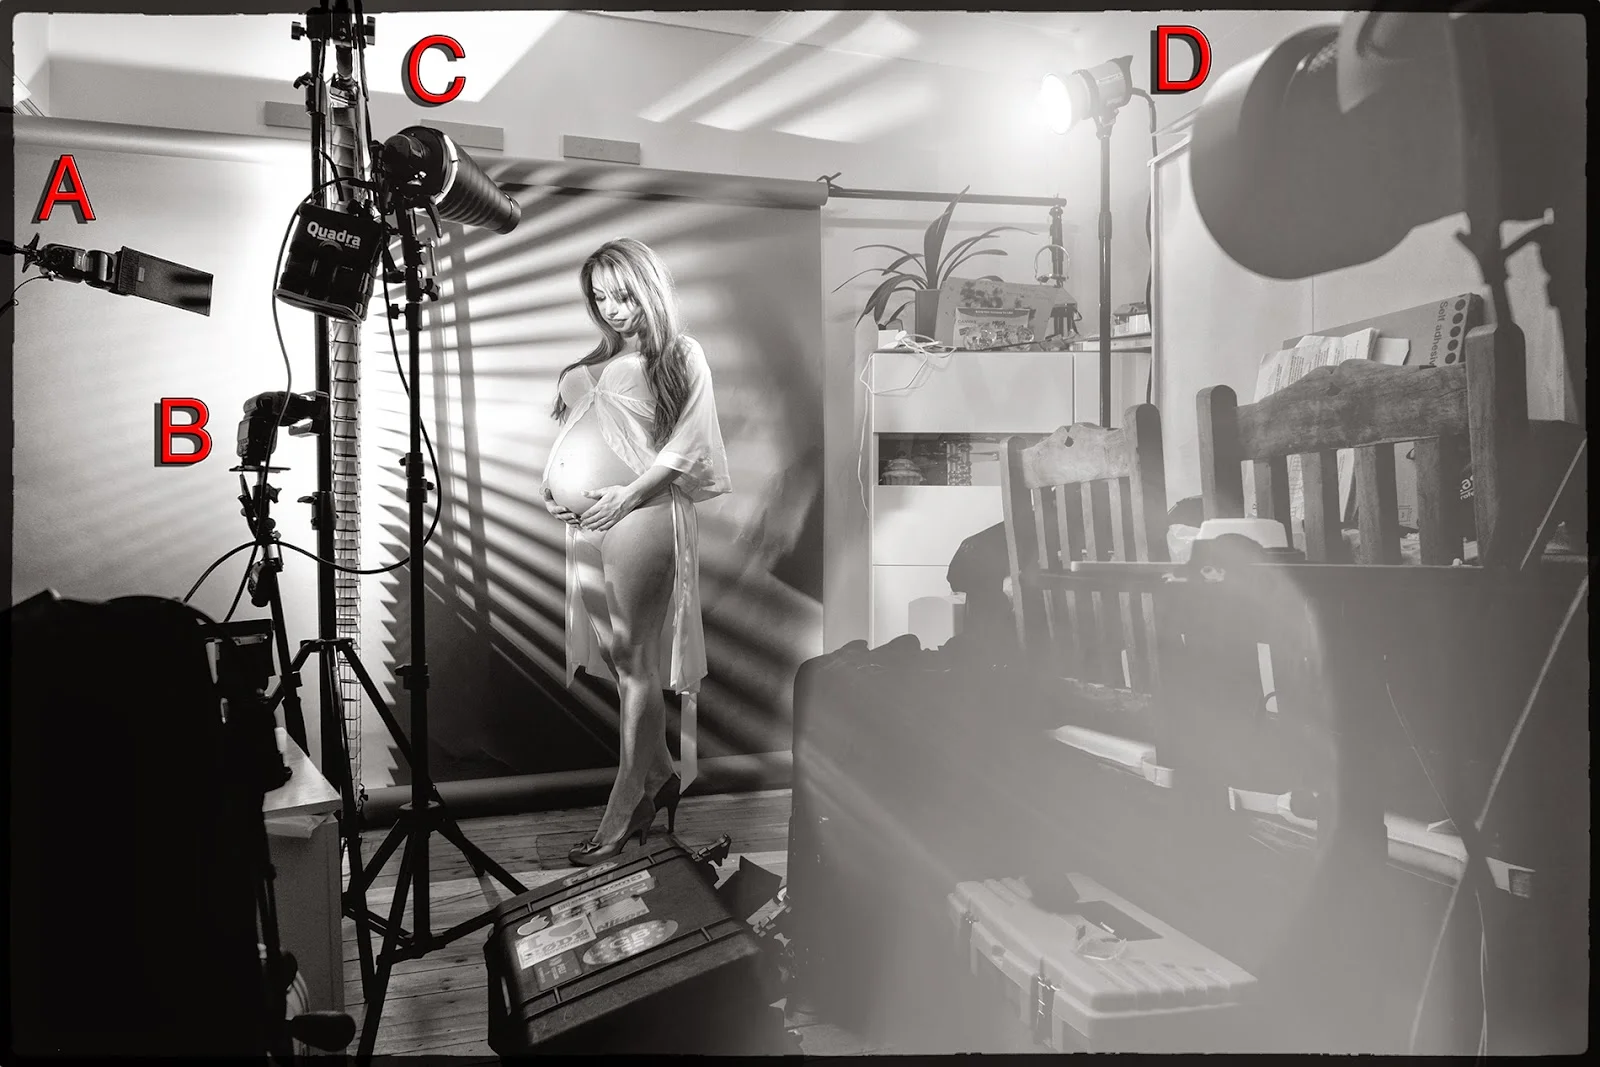
Here is the lighting set up used for the bellow image. The bellow image is unprocessed. A converted RAW file again to JPG.
To create the lines on the background i used a venetian blind that i purchased from B@Q a while ago.
(It was defective and on sale for a fiver, result!)
The lights.
A - Nikon sb900 flashed through the blind to create the background. It was flagged to prevent spill onto the subject.
B- Nikon sb900 through a honey comb grid. To illuminate the bump.
C - Elinchrom Quadra through a snoot to add a touch of light on the face.
D - Elinchrom Ranger through another grid, to add some light on to the hair.
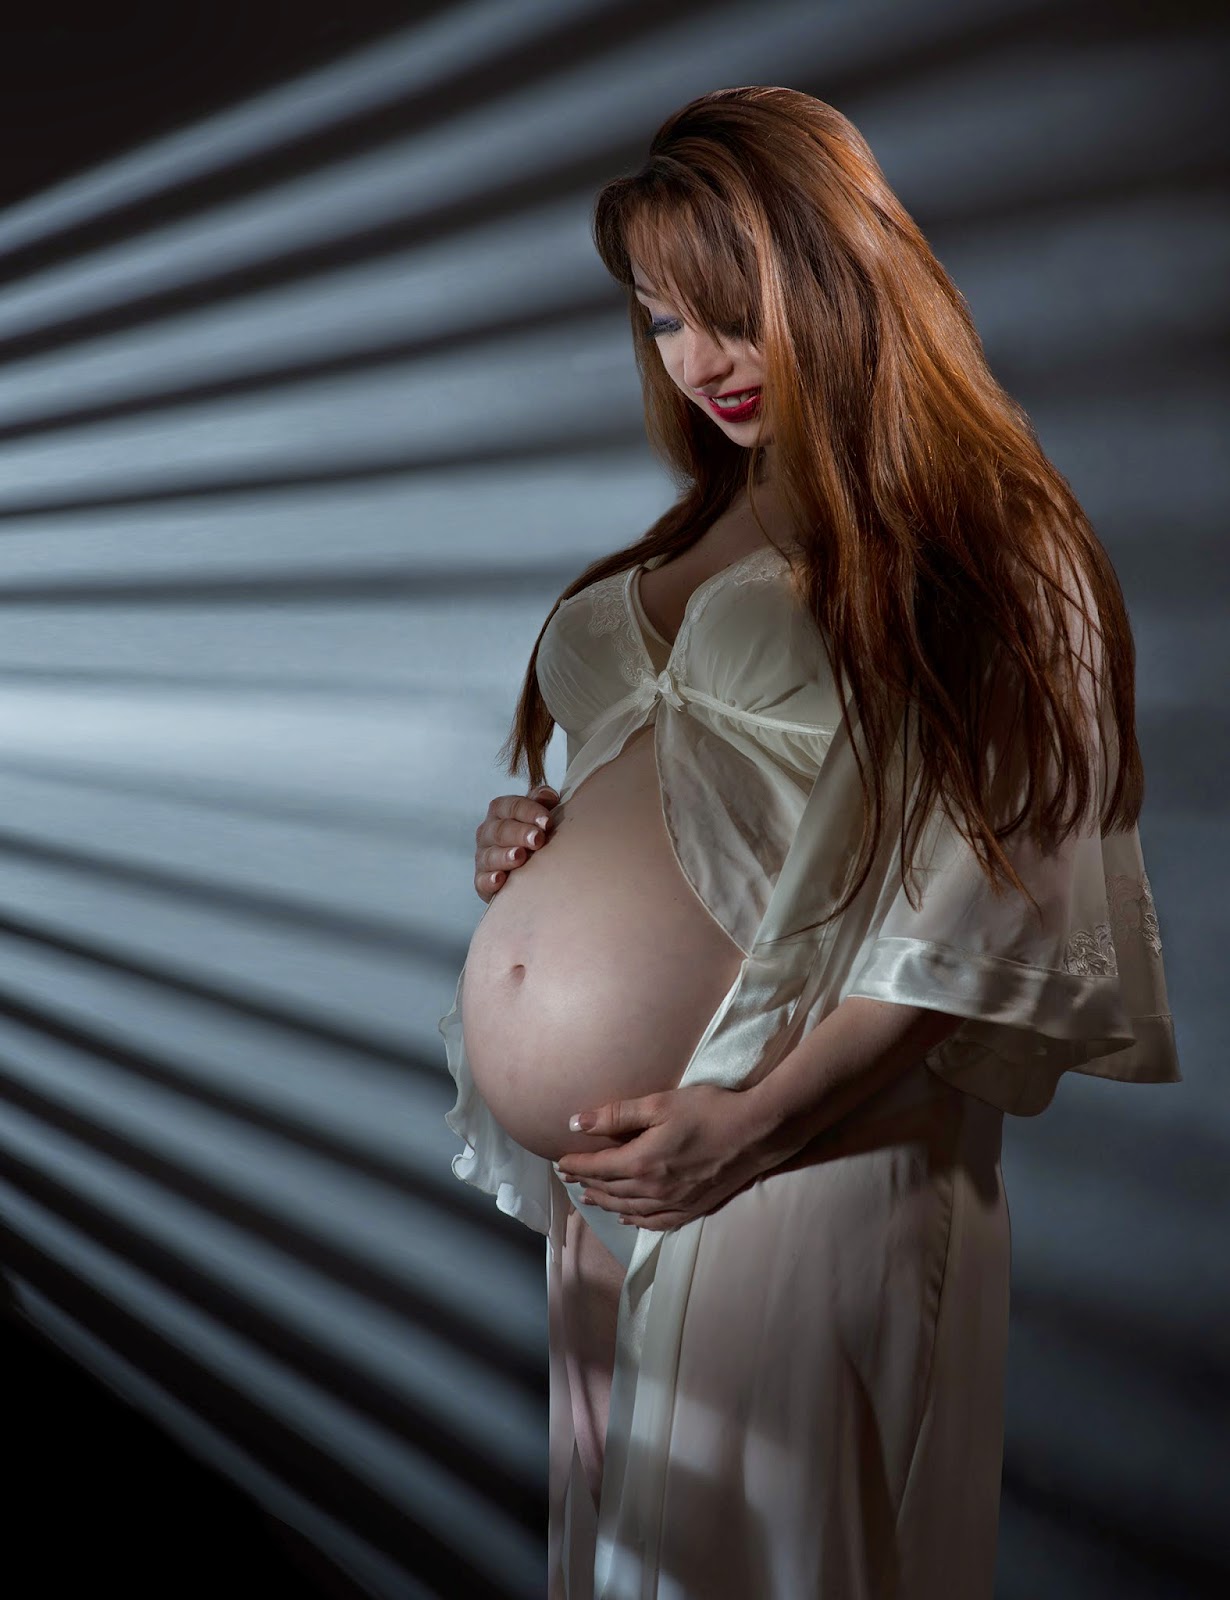
Nikon D800 f5.6 1/200 ISO 100
This was a fairly extensive lighting set up. It took a bit of time to set up, one light at a time.
When setting up lights like this, the subject has very little room to move. And so the set up takes patients from both parties. If your subject moves it can throw everything out.
Once the lights are set, relax. Make your subject relax and enjoy what you create!
I hope that you have enjoyed this week, viewing some work quite different from my norm.
Many thanks.
Lee.