How to

Photography tool - image stitching.

11 SKN electrical office front Aberdeen oil and gas industry

Good morning, i hope that you are well. 

Today i'd like to share a quick thought on how you can use image stitching to over come problems.

I appreciate that this is nothing new, but with some fore-thought it can become a powerful tool in your arsenal. 

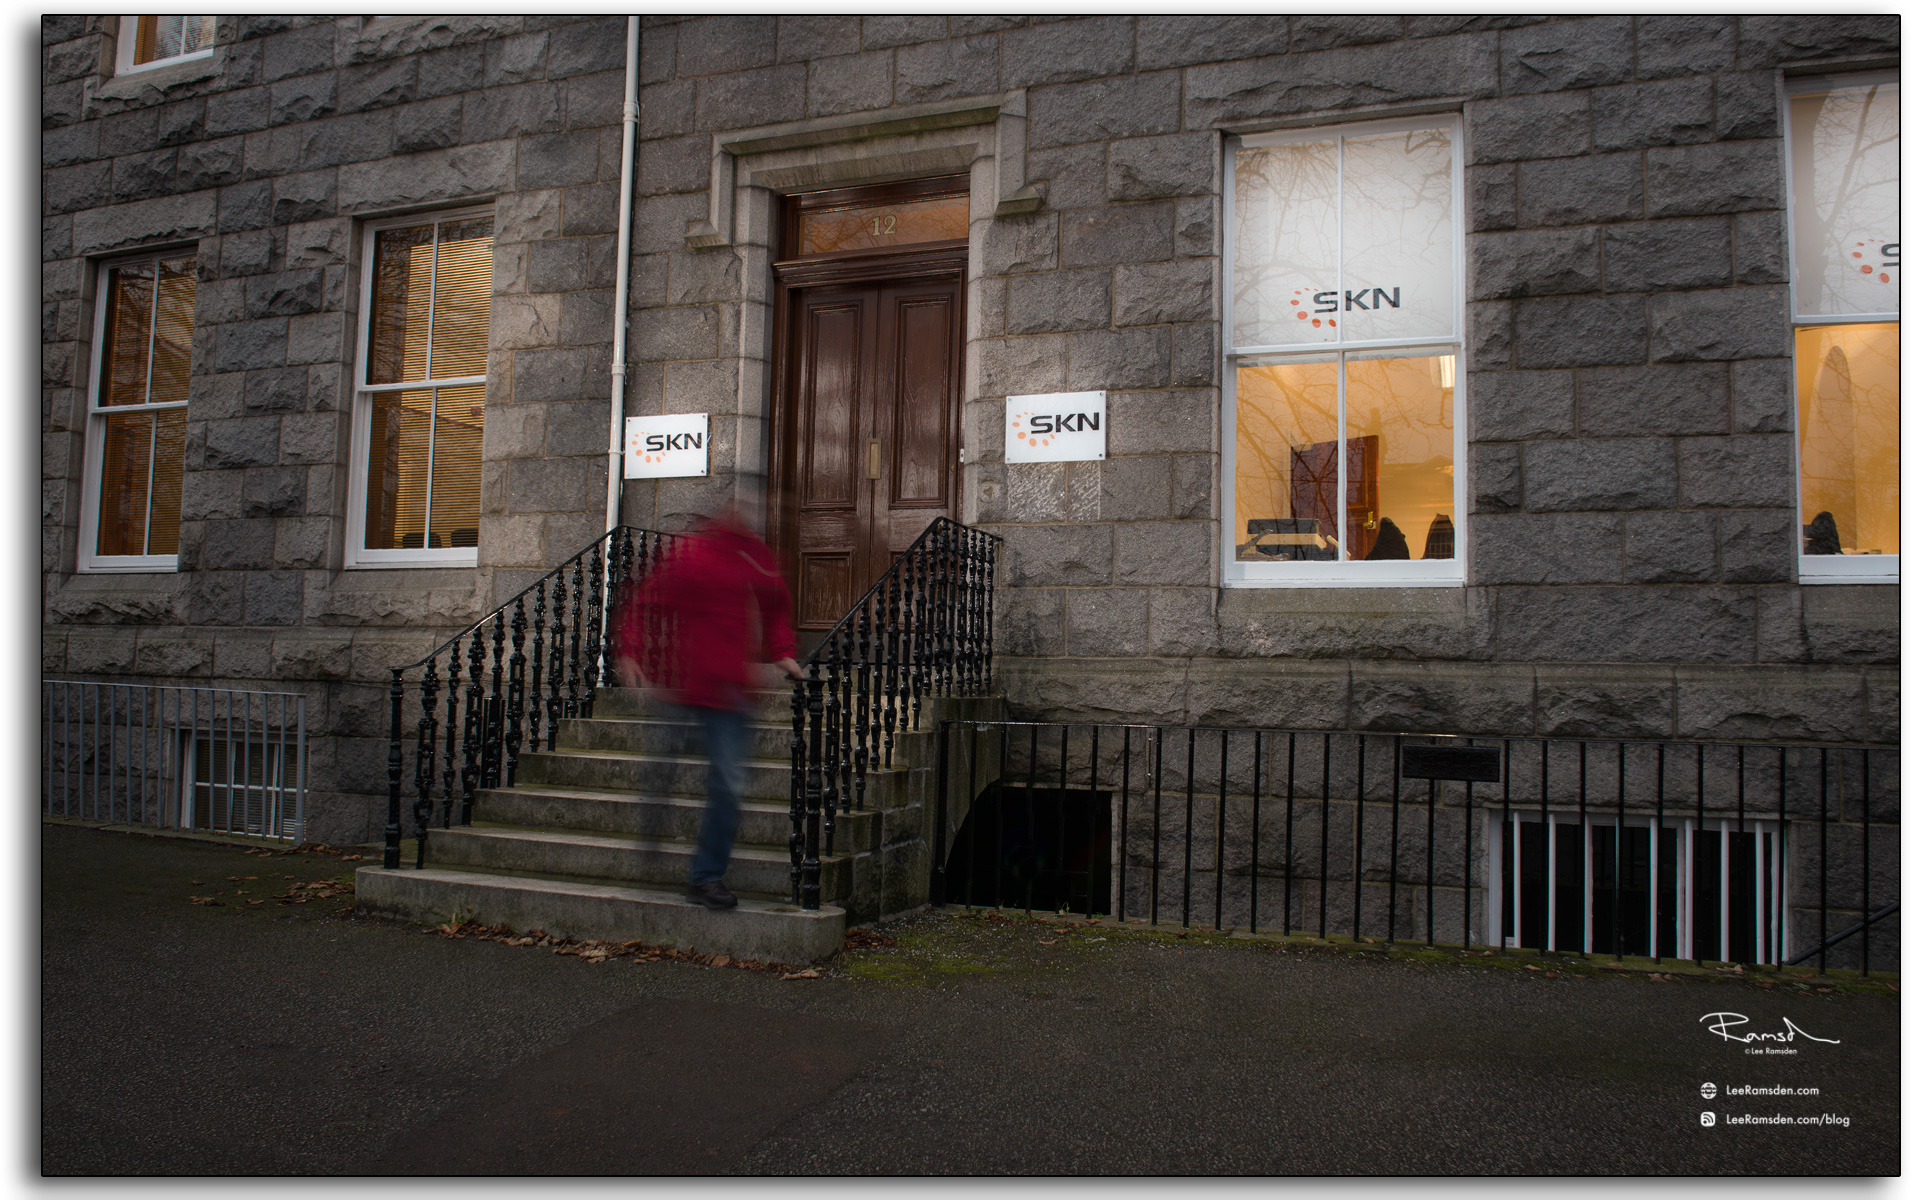
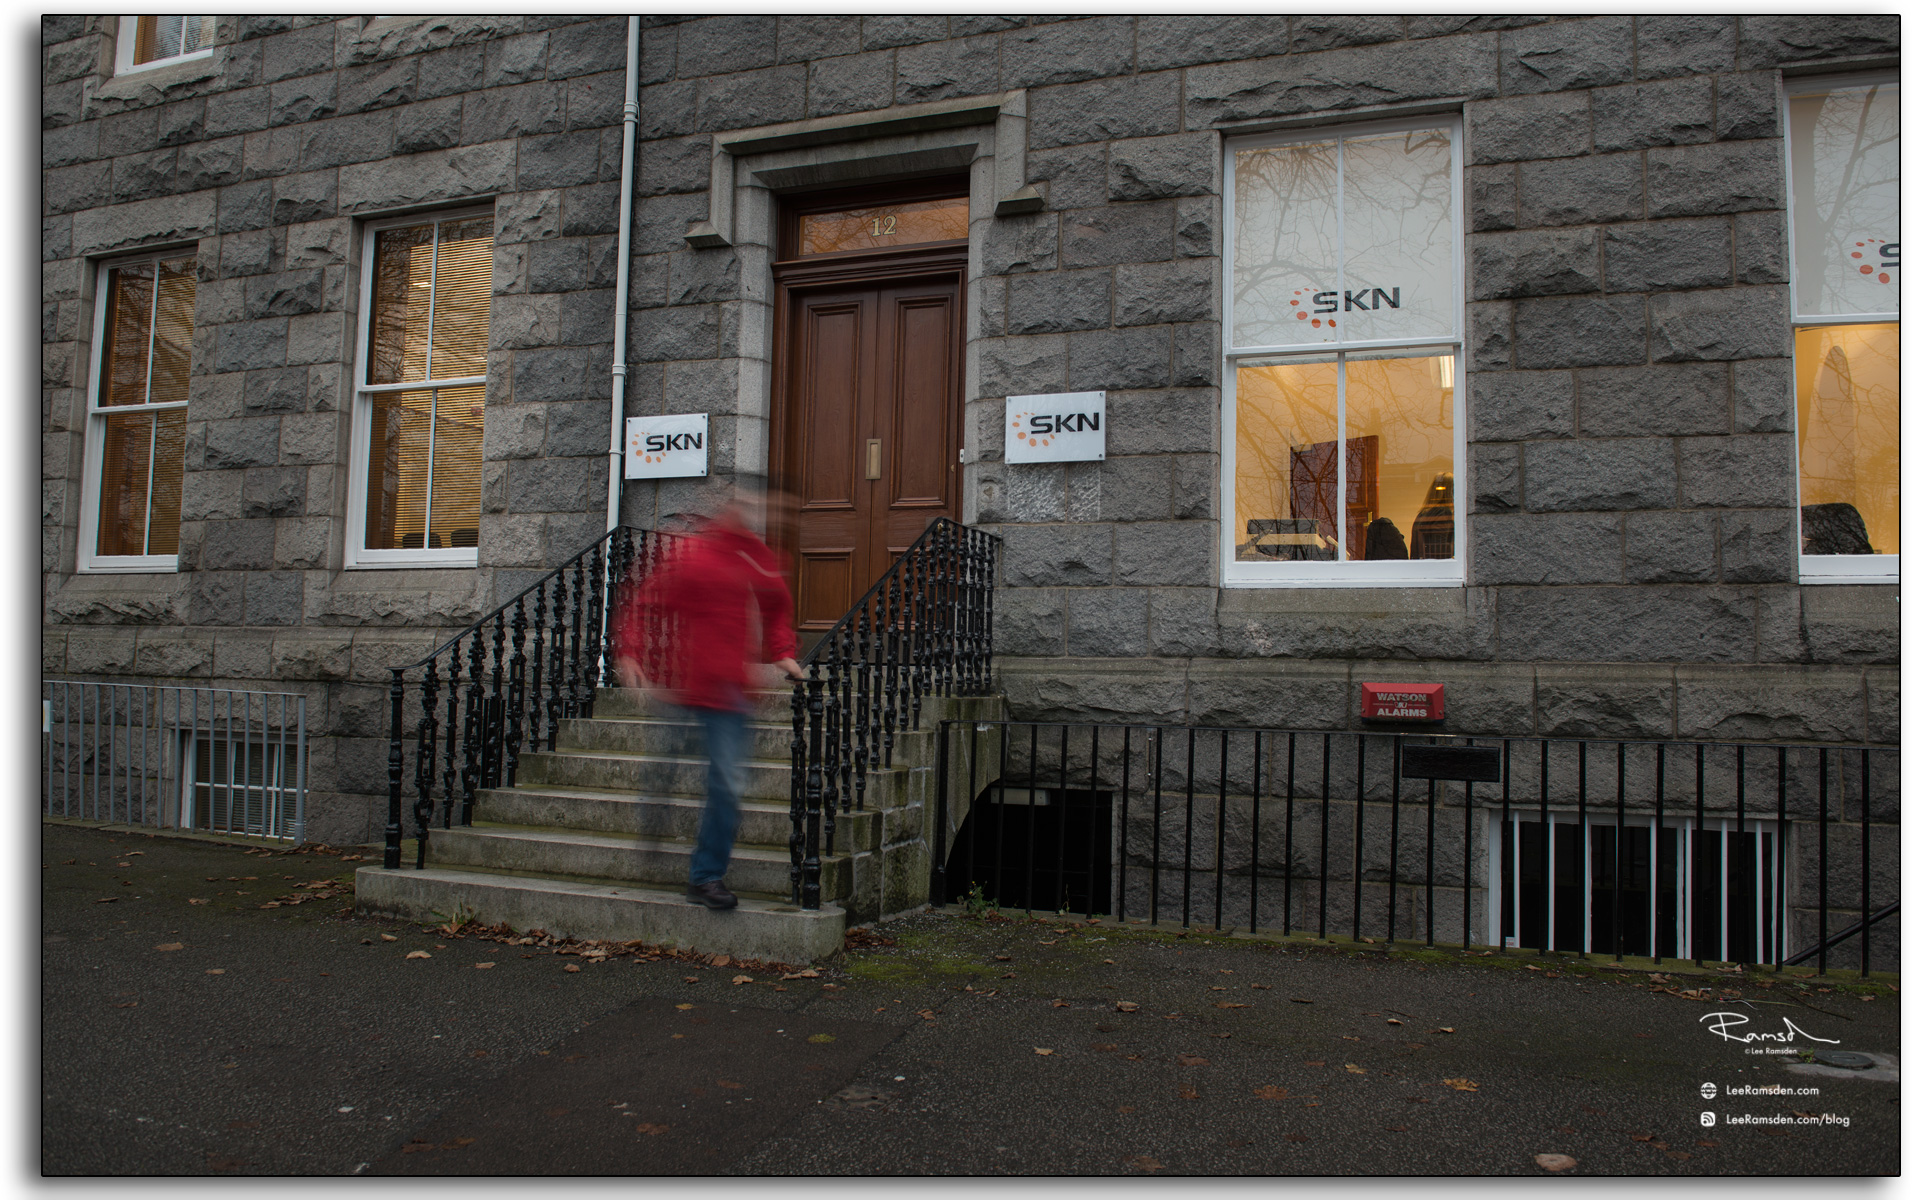
I was commissioned to shoot an office building. The front had no access due to very limited space and parked cars in my way. Even with the lens at 24mm it was simply impossible to fit the building into frame. So stitching is the only way forward. 

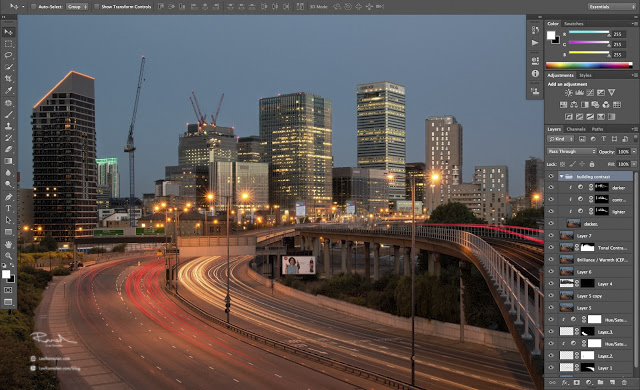
The above image was created with around 25 images. 

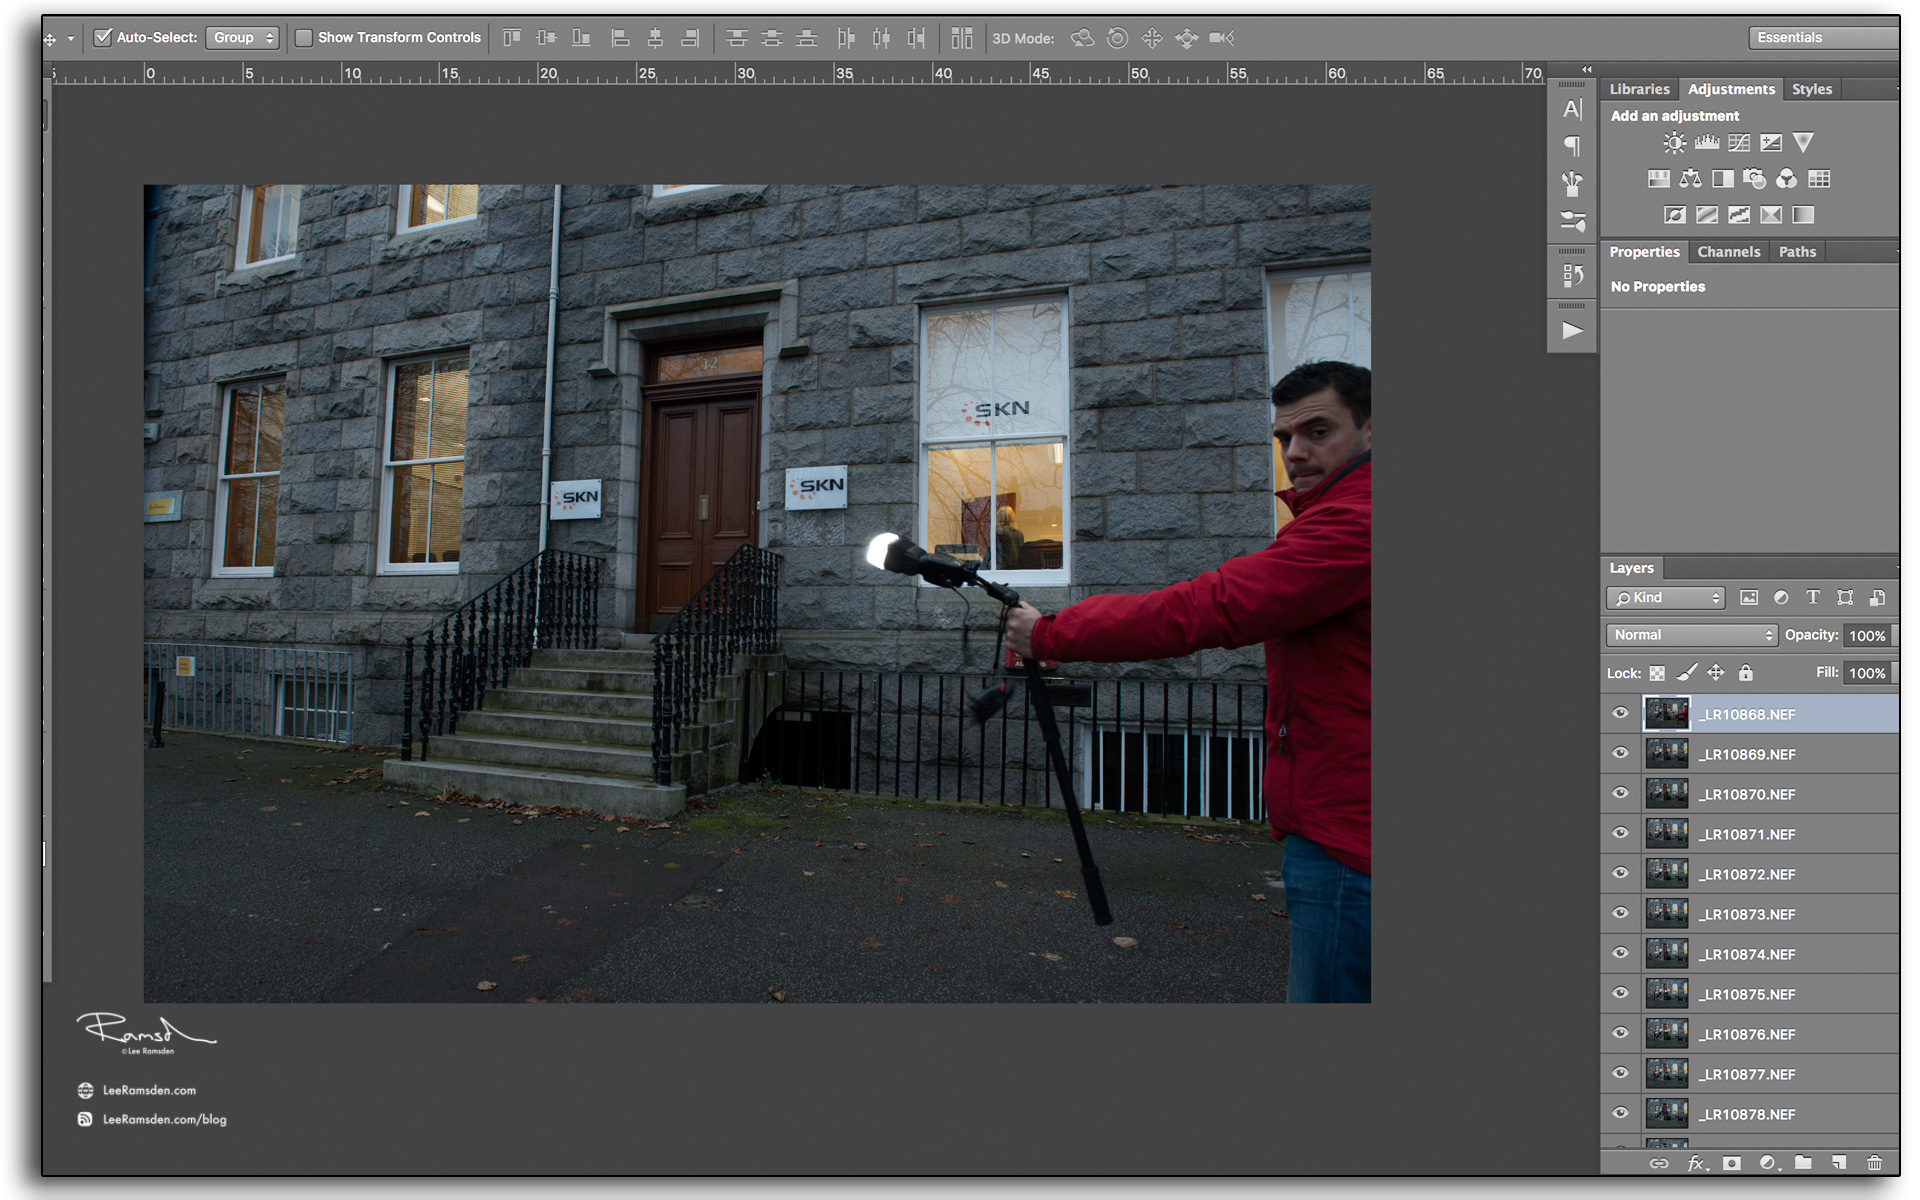
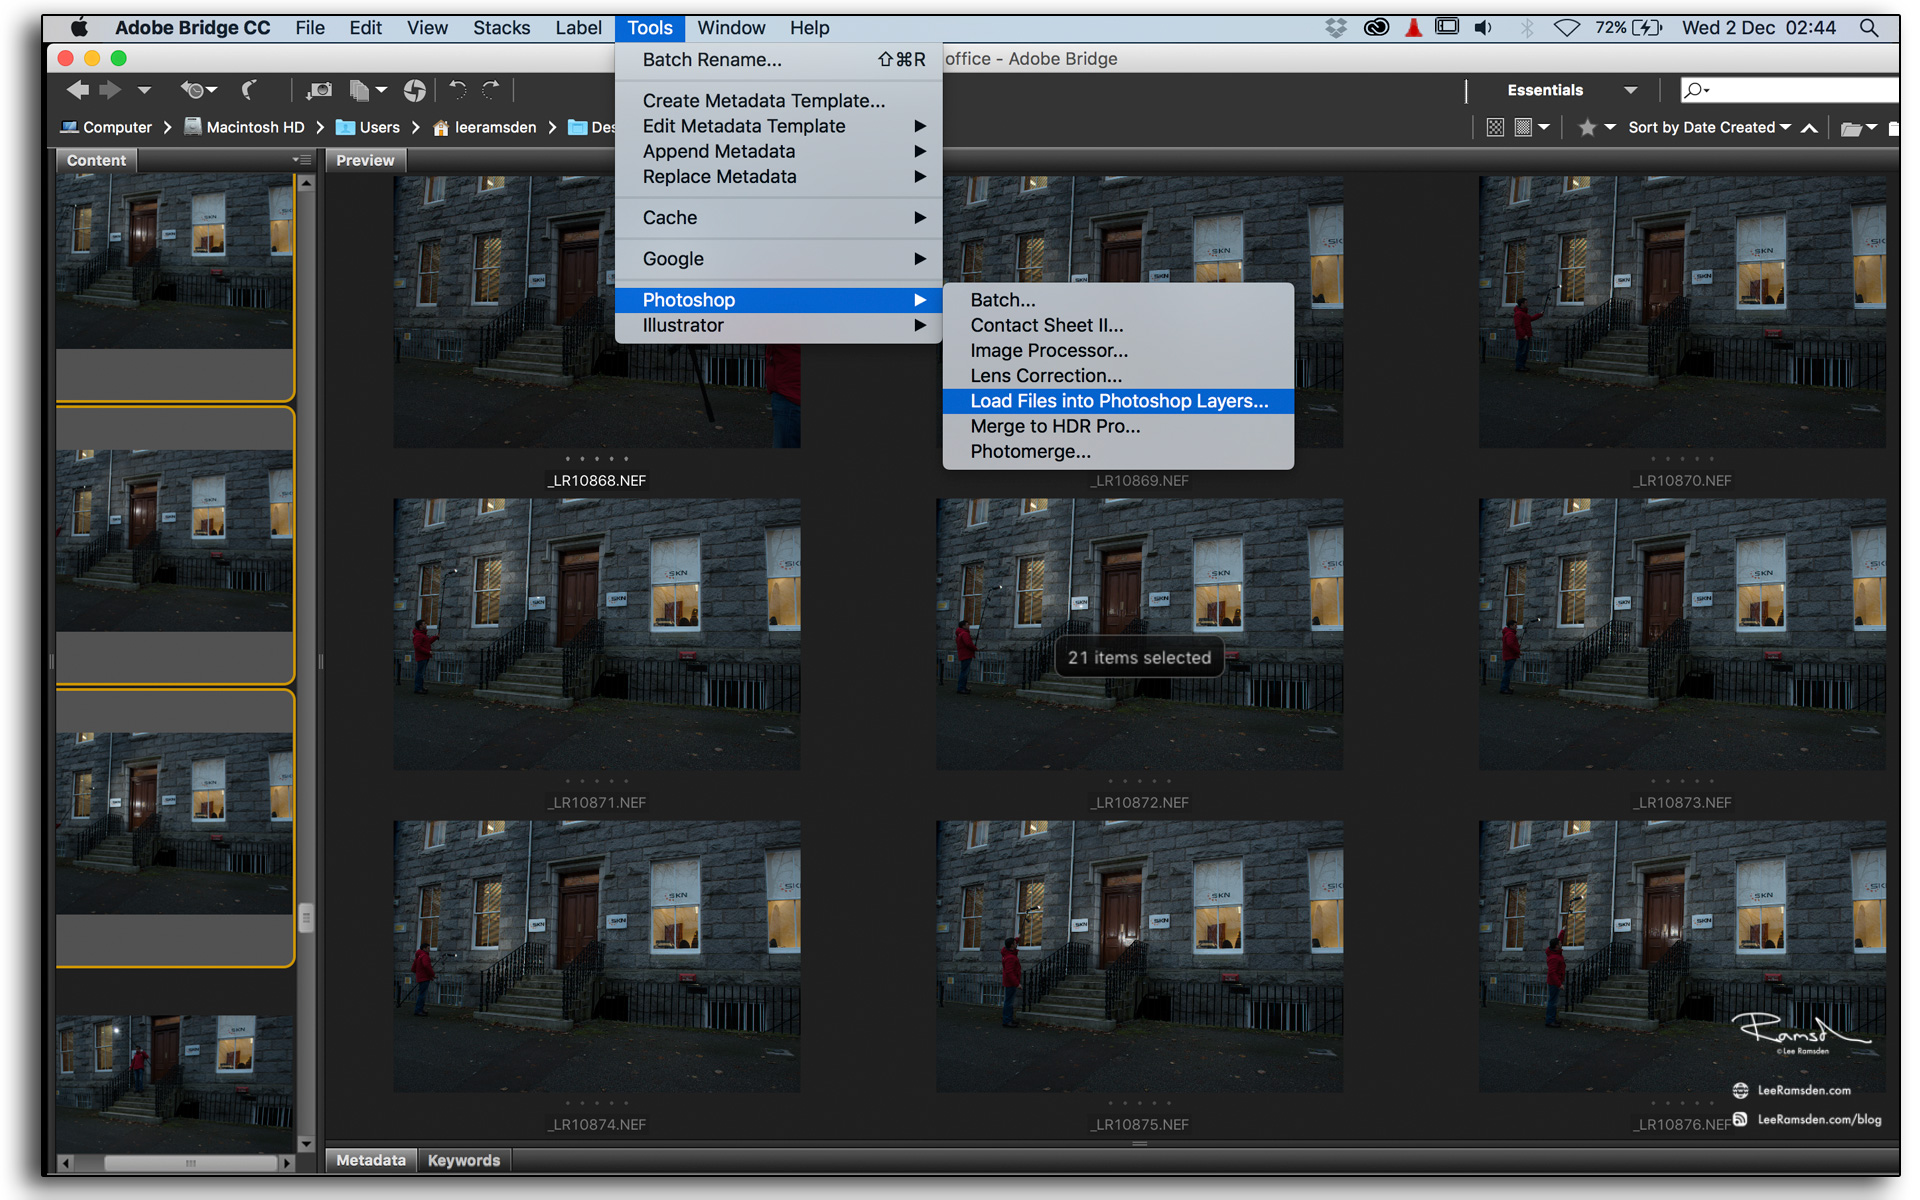
Here you can see the images used, 

the camera was mounted on a tripod and i systematically panned left to right making sure to over lap alot. The building took 3 passes.

Always best to have more frames than needed, than have pieces missing down the line. 

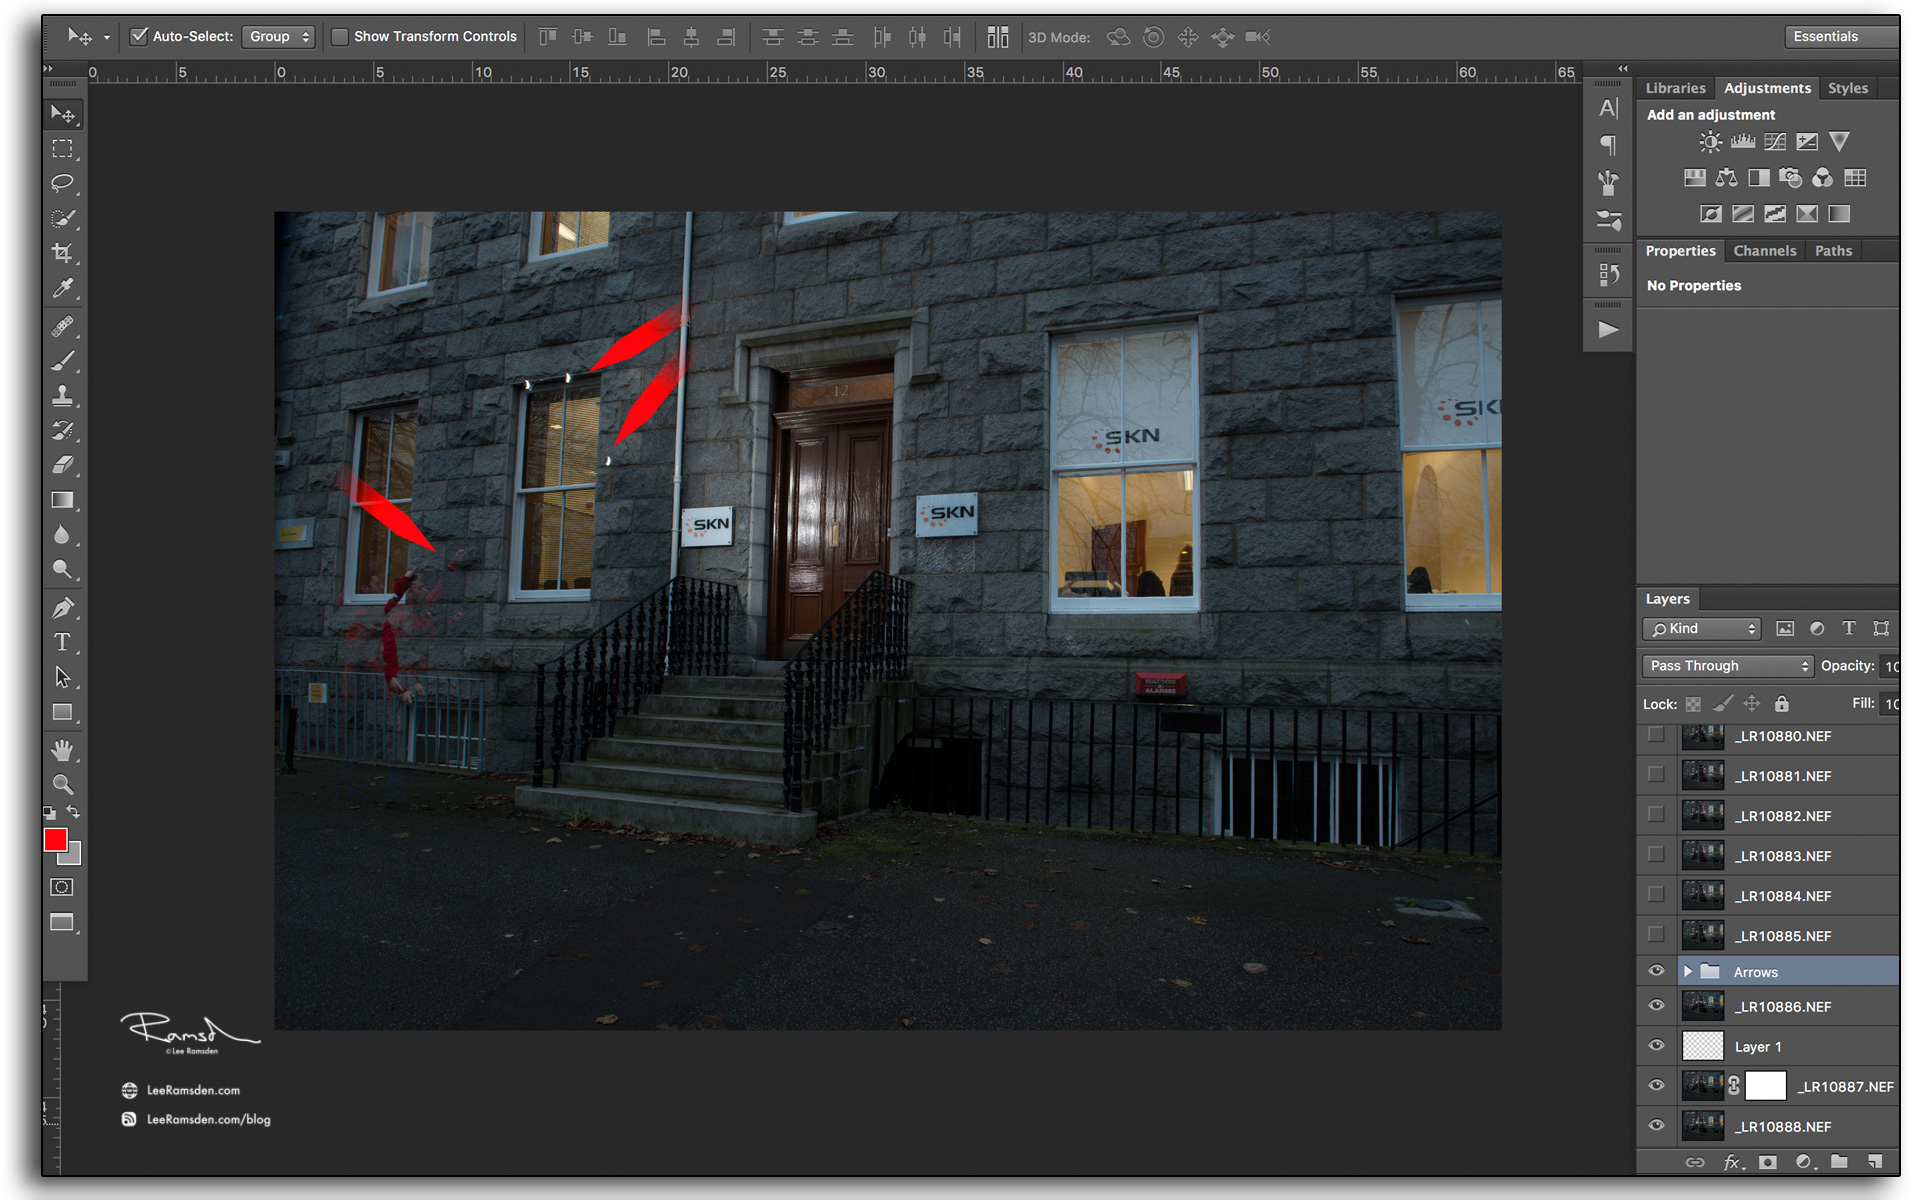
With each up date of Photoshop CC i have noticed that it is becoming much better at stitching. 

In the past it would have not been able to do this, and for these cases i use Autopano Giga 3.0 stitching software, but photoshop managed ok with this. 

Now by using a tilt shift lens, and/or a parallax tripod head, your job in post will be so much easier, but as i do not own either of these i had to make do. The majority of my time was spent straightening the stitched image. 

As with all panos, shoot in manual, turn white balance off auto so all the images remain consistent. 

I hope that this helps, and when you are trying to shoot a subject larger than your frame, that you remember this technique. 


Thanks


Lee

Scene lighting technique.

Nikon D800 f7.1 1/8th ISO100

Good morning, 

Id like to share with you a lighting technique that you can use to light a scene, even when working on your own. 

The above image consists of 21 images, all shot and lit by myself, and i am even in the image, to add some interest. 

I will show you, how i take multiple images, all lit with off camera flash, and then the process i take in photoshop.


02 Off camera flash wireless trigger pocket wizard boom illuminating the scene

Here you can see me using an off camera flash head on a pole, with the trigger in my right hand firing off the flash and camera shutter remotely. 

Click on image to enlarge.

The final image is composed of 21 frames. 

The camera was mounted on a tripod. White balance taken off auto, manual settings, and with me using back button focusing on the camera, i know when i press the remote, the camera will not try and focus, making all the images consistent. 

05 Start image quick tip on how to flash light

Quick tip, 

Like when making panos, my first image is a large image of me, so i can find the set easily in bridge. 

Also this is a great way to make sure that the flash and camera shutter both fire correctly. 

As when using pocket wizards as the remote, the flash PW has to be set to a channel higher and some times i forget this, and so it is always a good idea to test everything before getting started and walking far into the scene. 

04 adobe bridge using photoshop tools loading layers

Using bridge i select all the images that i want to use, and from here you can easily load them into photoshop as a single document with 21 layers. 

06 using lighten blend mode in photoshop CC

Now turn off all layers, and starting from the bottom layer i work my way up through the stack, turning on, one layer at a time, changing the blend mode to Lighten. 

07 using a mask in photoshop CC

With the blend mode on lighten, the flash light will show. 

Also you will see indicated in this image the hot spot of the flash is in the image. This is easy to mask out. Also i remain in the image by some strange artefacts, just simply mask these out. 

After some cleaning and tweaking here is the before and after image.

The before being unlit. 

It is a subtle difference, but one i find takes your images to that next level. 

If you have any questions, feel free to comment and i hope to help. 


Thanks

Lee

A subtle technique, but goes a long way..

Hello, here is a little tip which i have recently picked up and thought id share as it makes such a lovely difference.

When working on images of buildings here is how i now add contrast.

Rather then use contrast adjustment layer, i created two levels layers, one darker and one lighter - both with black layer masks.

Now take your time, and paint in, where the face of a building is lighter, make it lighter and the dark side darker. It takes a little time, but certainly gives your image much more depth and a 3D feel to them.

Tutorial Photoshop dodge burning layer

 This image has the effect turned off. 

The extra layer you can see is a contrast adjustment layer to the lighter layer.

Tutorial Photoshop how to make your image look more professional

Here is the final image with the contrast technique added. 

Subtle but certainly makes a lot of difference to the image.

canary wharf London Photography Train line Long Exposure light trails


The View at The Shard London photography tips.

Photographing The Shard Viewing Gallery, London

The Shard is the tallest building in the United Kingdom, standing 309 metres above London Bridge at its tip. Designed by Renzo Piano and completed in 2012, it's become one of the most recognisable additions to the London skyline in a generation. The viewing gallery sits across floors 68 to 72, giving unobstructed 360-degree views across the city.

I visited specifically to shoot the transition from sunset to dark — the window when the city starts to light up while the sky still holds colour. Getting that timing right requires some planning. The booking system lets you choose your time slot, so I researched the sunset time in advance and booked accordingly. The weather cooperated, which after a prolonged cold spell felt like a result in itself....

mobile, iphone, Lee, Ramsden, London, The View From The Shad, Landscape, Photography, Lancashire, HDR

Practical Photography Tips for the Shard Viewing Gallery

A few things that made a genuine difference on this visit:

Tripods are banned, as they are at most tourist viewing platforms. The workaround I used was a Manfrotto magic arm and super clamp, which attaches to the barrier rail and gives a completely stable platform for long exposures. Security observed me using it and raised no objection — it's discreet enough not to interfere with other visitors and doesn't technically break the no-tripod rule.

london View from the Shard HMS Belfast river Thames Tower Bridge

Shooting through glass always risks reflections. A circular polarising filter cuts through most of this.

I was using a Hoya 52mm Pro-1 Digital CPL, which handled the glass cleanly and brought out the contrast in the city lights below. Without it, the reflections from the interior lighting would have competed with the view on every shot.

The Nikon D700 was the body used here — one of the frames in this set was actually pulled from a timelapse sequence. I had changed the ISO to 3200 mid-session and forgotten to reset it, but the D700 handles high ISO well enough that the image was still usable. A lesson in checking your settings between sequences.

Manfrotto G clamp

The Building Itself

From street level and from a distance, the Shard reads as a glass spike — almost impossibly thin against the sky. From inside the viewing gallery you get a different perspective on how it sits within London, with the Thames directly below and the city grid spreading out in every direction. Canary Wharf, St Paul's, the Tate Modern, and Tower Bridge are all visible simultaneously, which gives you a sense of the scale of the city that's hard to get anywhere else.

For more of my London and places photography, visit the Places gallery.